DDR Auto-Classification
Votiro's Auto-Classification solution is based on Microsoft Purview Sensitive Labels. Integrating Votiro DDR and Microsoft Purview Sensitive Labels creates a comprehensive data protection and compliance solution that leverages the strengths of both platforms. The admin can create Microsoft Sensitivity labels and set desired Votiro DDR policies to perform auto-classification based on a document's sensitive data.
Key Capabilities
|
n |
Content Inspection - Automatically scans and analyzes files, emails, and other content for sensitive information. |
|
n |
Policy-Driven Labeling - Administrators define policies to specify when and how labels should be applied.
|
For example:
|
t |
Apply a "Confidential" label if a document contains a credit card number. |
|
t |
Apply a "Highly Confidential" label if the file contains sensitive legal or healthcare terms. |
|
n |
Real-Time Auto-Classification - Automatically applies labels as content is created, modified, or shared within Microsoft 365 apps like Word, Excel, and Outlook. Ensures that sensitive content is secured immediately upon detection. |
Benefits of Automatic Labeling
|
n |
Efficiency - Reduces the burden on employees to manually label content, ensuring consistent application of policies. |
|
n |
Accuracy - Minimizes errors and oversights, improving the reliability of data classification and protection. |
|
n |
Compliance- Helps meet regulatory requirements by automating data protection and classification processes. |
|
n |
Scalability - Enables large organizations to apply data governance at scale without manual intervention. |
Prerequisites
Microsoft Purview sensitivity labels are available to use.
To learn how to create Microsoft sensitivity labels, see Create and configure sensitivity labels and their policies.
Note:
If masking is enabled, Auto-Classification will be applied after masking is implemented.
Procedure
|
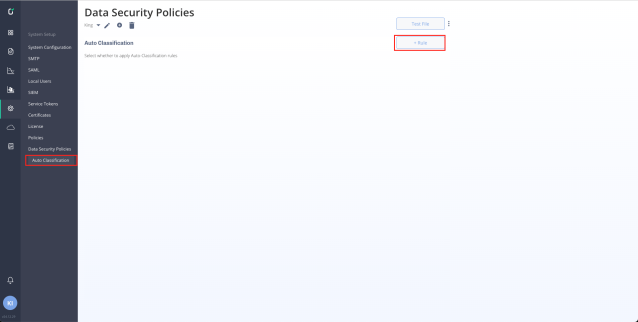
1. |
From the navigation pane on the left, click Settings > Auto Classification. |
|
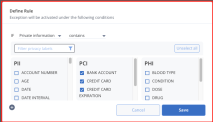
2. |
Click on + Rule to create a new rule. The Define Rule window opens: |
|
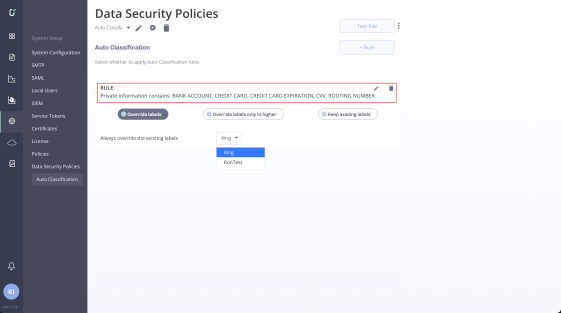
3. |
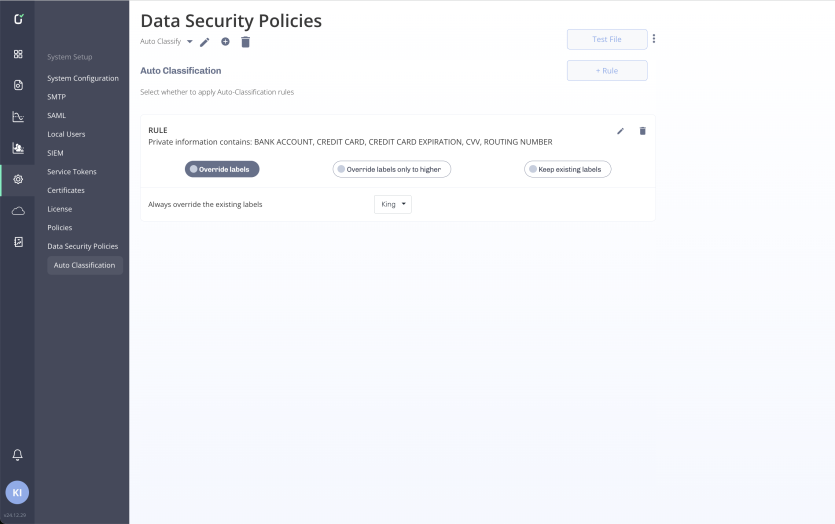
Select the desired data labels and click on Save. The new rule is displayed on the Auto Classification page: |
|
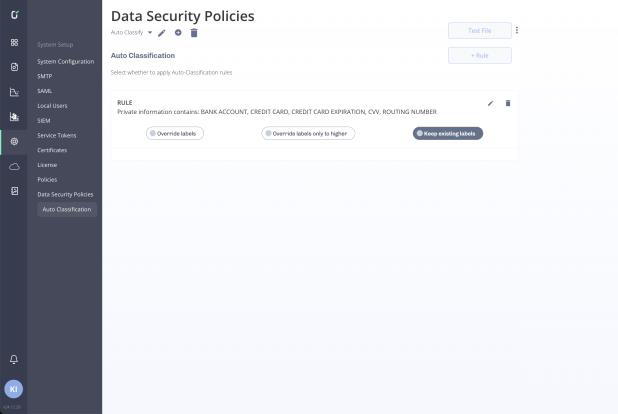
4. |
After creating a rule, select one of the three policy actions to apply: |
|
t |
Keep existing labels - This is the default. Votiro will analyze the existing label only, without modification. This action is equivalent to “Only Analyze” mode. |
|
t |
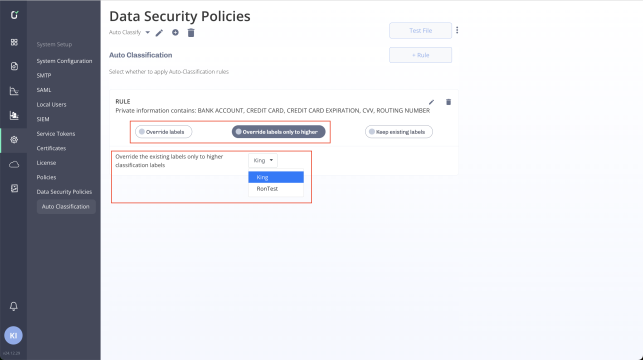
Override labels only to higher - Votiro will analyze the existing label and will override the label only if the sensitive content matches a higher priority level. The user will be able to choose which label to set in this case. |
Note:
Priority is set on Microsoft sensitivity labels.
Behavior will be the same for files without labels.
For example:
|
i. |
There are two available labels: |
|
|
Confidential – Priority 1 (Low) |
|
|
Highly Confidential – Priority 2 (Higher) |
|
ii. |
The user labels the file as Confidential. |
|
iii. |
The file is sent by email/other Microsoft Apps (OneDrive, SharePoint, Teams). |
|
iv. |
Votiro analyzes the file-sensitive content and detects that the content matches the Highly Confidential label. |
|
v. |
Votiro auto-classifies the file with a Highly Confidential label. |
|
t |
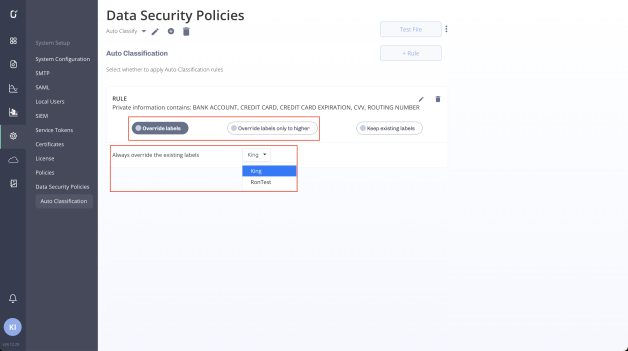
Override labels - Votiro will analyze the existing label and will always override to the desired label. |
Note:
Behavior will be the same for files without labels.
E2E Workflow
The following example illustrates a Votiro Auto-Classification use case of users uploading files to OneDrive without sensitive labels.
|
1. |
The administrator configures the Auto-Classification rule. |
|
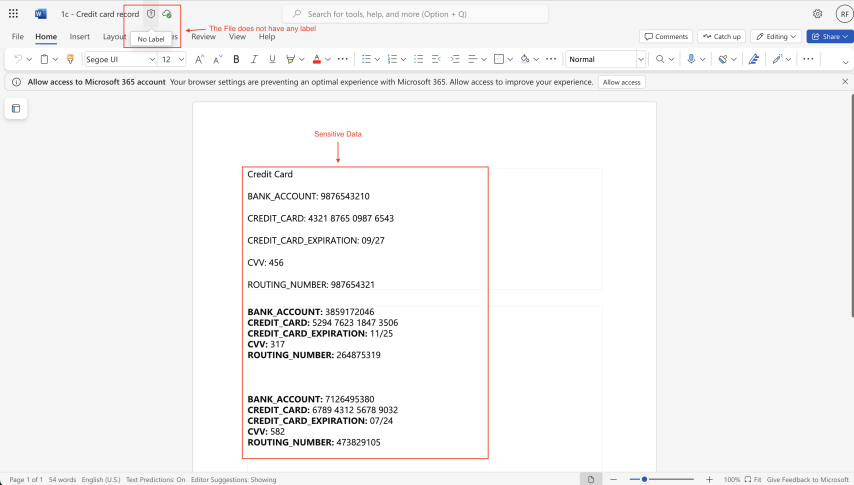
2. |
A user uploads a file to OneDrive. The file does not have any label, and the file contains sensitive data. |

|
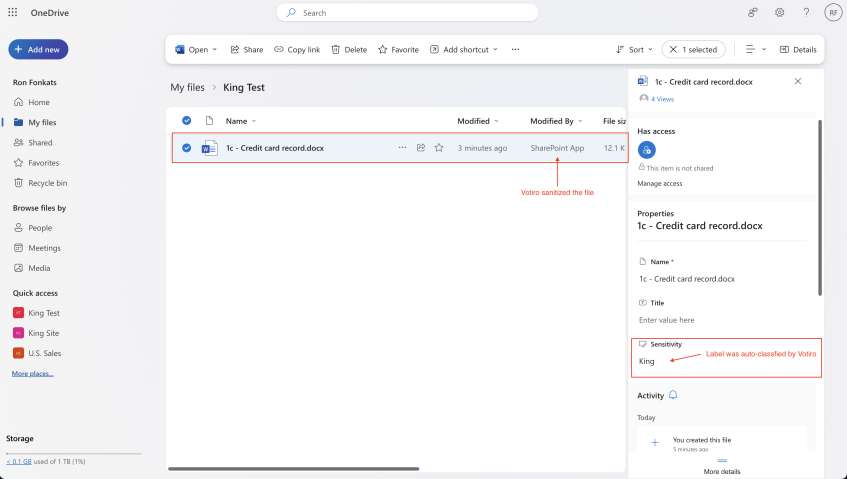
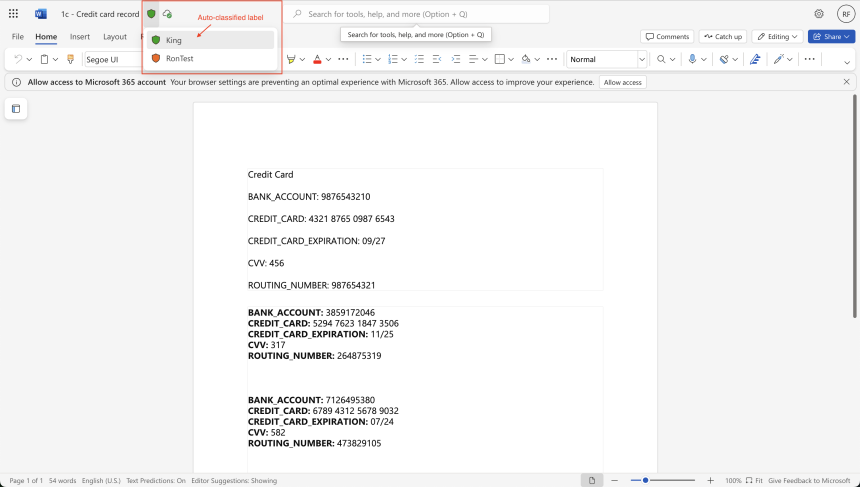
3. |
Votiro sanitizes the file and auto-classifies the file based on the detected sensitive data and matched rules. |
|
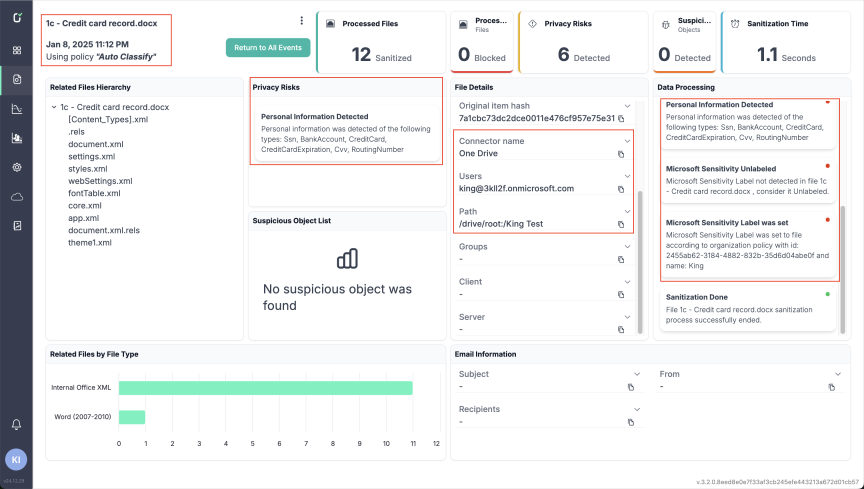
4. |
Votiro Analytics are available on the Events page: |

Comments
0 comments
Please sign in to leave a comment.